Disposable tiered cupcake platter (recycled)
This is a cheap frugal environmentally responsible way to bring cupcakes to a picnic or someone else's house, without having to keep track of the platter.

The platter is made from a used shipping box, a torn gift bag (or foil, comics from the newspaper, or salvaged gift wrap), some packing tape, and two paper doilies (optional).
I timed myself as I made it this time, and it took about 10 minutes, including snapping the photos.
This is also a great way to fit many cupcakes in the freezer before delivery.

Disassemble the box. I'm going to call the panels A B C and D. The doily is 12" in diameter. It fits on panel A, with the middle and a bit of one of the sides.

Cut the disassembled box between panels B and C, resulting in
two double panels: AB and CD.
Using the AB piece, trim one of the flaps from the A panel and the same part from B panel. The AB will be roughly 2/3 as long, with A and B still attached to each other.
Open the AB panels with the outside of the box face up. Tape the parts that were just removed to each of A and B, over the fold. The goal is to make the fold not work anymore, resulting in cardboard panels that don't bend.
Fold panels A and B together, with the taped-on parts in the middle. Secure the folded AB (now 2/3 of a panel in size, doubled most places and reinforced in the middle) with tape all around. This is the bottom tray.
With panels C and D, do the same as with the pair of panels A and B, but this time, remove both flaps, using only the middle parts, folded together (with the inside of the box facing out), to make a smaller top tray.
Taking one of the discarded panels from the CD pair, trim its width to the height desired between the two trays. Leave its length intact.
Take this piece and fold it in half, width-wise.
Open the fold, and fold the edges into the middle. This will result in three folds, with four sections.
Overlap two of the sections to form a triangle and tape to secure. This is the pedestal that holds the top tray.
Trim one of the (optional) doilies to make a compatible, smaller doily for the top.

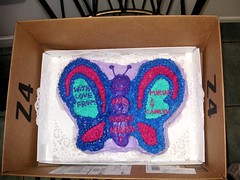
The trays can be covered with aluminum foil, recycled gift wrap, comics from the Sunday newspaper, etc. This time, I used a torn and written-upon recycled gift bag. Gift bags are great from this, because they are usually made from a large sheet of strong decorative paper.
For best results, use a bag that, when closed, is at least as large as the bottom tray. This will allow a single bag to cover the entire project, and for the project to be covered by unfolded paper (which looks nicer).

Cover the two trays and tape to secure. Don't worry if there isn't enough paper to cover the bottoms. Tape the doilies in place. The doilies are great for covering up the rips or writing on the bags.
Cover the triangular pedestal, leaving it hollow - don't cover the triangle at the bottom.
Tape the pedestal to the bottom of the top tray. Then, run three pieces of tape inside the three inside sides of the pedestal. It was hard to show in a photo, but in this picture, my thumb and fore-finger are each touching the sticky part of tape. The third piece is hanging over the third edge.
Invert this onto the top of the bottom tray to secure. If more tape is needed, go for it.
Remember, it's going to be covered in cupcakes and then discarded. Any over-engineering with clear packing tape will be invisible. I promise not to tell anyone.


1 comments, so far. Add yours now!
Post a Comment
Shavua tov! Hope you got my KCC entry, I didn't get a receipt.
Nice project, but the type of thing I would never do!
Post a Comment