Showing posts with label make. Show all posts

Wednesday, October 29, 2008

Quick Ribbon Bookmark

Here's a quick and durable way to add a ribbon bookmark to a hardcover book, without defacing the book.

It's worth five minutes to install a set of bookmarks in a text at the beginning of a semester.

Thin satin ribbon spools often go on sale at craft and sewing stores (or the craft/sewing section of Wal-Mart) for 25 cents a spool.

For a text that I plan to study slowly and intently, I like to have four markers. To make this, I use two colors of ribbon, each cut to more than twice the height of the book. This will result in two markers of each of the two colors.

I start by poking a hole in the top of the spine with a thumbtack (or safety pin), just above the top of the pages.
I use a dental floss threader to attach the ribbon securely. In the picture below, you can see the floss threader threaded through the thumbtack hole.

I kept this picture in the tutorial because it shows the threader and the hole very clearly, but when I do this, I start with the loop on the opposite (inside) side of the book, with the lead on the outside.

Thread the ribbons through the floss threader's loop.


Pull the floss threaders taught.


Feed the tail end of the threader back through the threader's loop on the inside, and pull taught again.
Tuck the long end of the tail into the space between the cover and the book's pages. I use a cake tester or barbecue skewer to help push the tail and keep it from bunching up.

Lifting the ribbon up and over the back of the book, secure the ribbon/threader knot with a tiny bit of glue. Be careful not to let the glue get on the pages or interfere with the pages' movement.


Below is a better picture of what the finished product/floss knot looks like from the outside/spine of the book:


Obviously, this isn't suited to heirloom or very expensive books. But, for a "working text", I think the floss is discreet and unobtrusive. I suppose, it could be painted to match the book's spine, too.


Trim the excess length of ribbon on the diagonal, and (optional) add a dot of nail polish to the ribbon ends to prevent fraying.


A few bookdarts conveniently tucked away on the back page, and voila! Ready to study!

Friday, October 10, 2008

Easy Sukkot Project: Free printable sentences for banners to print and color


This is my favorite sukkah decorating project to make with a group of kids that span a large age range.

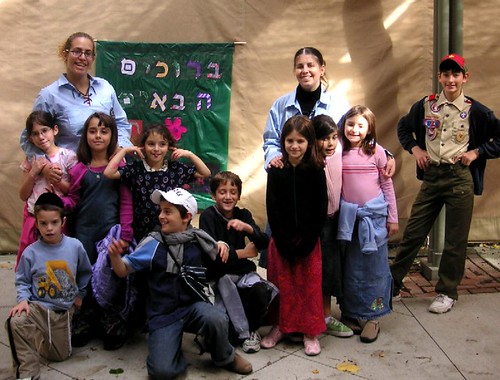
I've done this every year for many years with large groups of kids from the community, to decorate our synagogue's HUGE sukkah, with Boy Scout troops, and Bnei Akiva. We've also used this with our family sukkah at home.

The beauty is that it's a cheap, easy, and age-independent project. Since everyone gets their own page to color, minimal cooperation skills are required. I like how everyone works together on one big project, but each can take his own page to a corner of the room, without having to stake out space on a group coloring project.


In addition to the free downloadable sentence files below, you'll need a plastic disposable tablecloth in a bright color (not white), scissors, markers or crayons, and packing tape. One or two sticks or dowels, a bit wider than the tablecloth, is helpful but optional. We sometimes scavenge branches for this, for a rustic and natural (read:free) look.

(The sentence files are quite large. Right click and select "save target as..." to download them.)


I like to use the tablecloths-on-a-roll. They're cheap (under $20 for a near-lifetime supply), and don't need to be folded. We use them for so many other projects, too: costumes at Purim, covering the counters at Pesach, and sometimes we even cover a table with them!

For each sentence, print both the coloring pages and the index page. It's amazing how easy it is to misspell even simplest words, when the letters are all jumbled up and in the hands of an escaping marker-wielding toddler!

Allow the children to color in the letters in whatever way they like. When the letters are complete, cut (or have a few older kids who can be trusted with the scissors do the cutting) along outlines. This will guarantee that even the scribbles of a two year old will be readable as letters, and will show up from across the sukkah.

Use the clear packing tape to completely cover the cut-out letters, effectively laminating them as they are affixed to the disposable plastic tablecloth.

Optional: Leave enough room on the tablecloth to make a bit of a hem on both the top and bottom of the banner, and slip the optional sticks or dowels through this hem to keep the banner straight in the wind.

Depending on the what your sukkah is made of, affix the banner using rope, safety pins, tape, bungee balls, etc.

===================================
For more Sukkot projects, click here.
===================================

Wednesday, December 19, 2007

Son of a Draft Dodger and Charlie the Tuna

How to attach a magnetic draft dodger to a wood door:


The more it snows (Tiddely pom),
The more it goes (Tiddely pom),
On snowing.

And nobody knows (Tiddely pom),
How cold my toes (Tiddely pom),
Are growing.

-Winnie The Pooh, as reported to A. A. Milne


The draft dodger I made on Monday was so helpful, I've been making them for the other drafty doors in our house.

Magnets inside the draft dodger tube keep it attached as the door swings open and closed. In our mudroom, the magnets were aligned with the nails that held the door flashing.

Most of the doors in our house are wooden and without flashing. In order to use this design on non-metal doors, I could have stuck a few tacks or nails along the bottom. However, I didn't want to do anything permanent to the doors; I didn't want to mar their surface with nails, or risk misaligning the hinges by banging on them with a hammer.

Enter Charlie, stage right. Last week, he solved my vitamin-pill woes. This week, I called upon him to protect my chilly toes.

I used the same method as before, attaching (clean!) tuna can lids with leftover 3M command strips. These allow for a secure attachment, but a complete removal if necessary.

To improve the aesthetics, I cut them into butterflies and painted them. (What? You were expecting me to panel the house in tuna lids? )

The tuna lids cut easily, but have sharp edges. I'd recommend NOT using your best scissors for this activity.

I used Jacquard "lumiere" metallic and opalescent paints for this. I love these paints; they are a joy to use. I started with one of their "exciter" sample kits a few years ago, and fell in love with its rich, generous, high-quality pigment concentration and beautiful colors.

It is expensive paint, but I think it worth the price. Now I buy them in bulk either on-line from dickblick or dharma, or from the local craft store (when I have a coupon.)

Note the ever present bottle-cap paint pallets.

A commenter suggested it would be better if were waterproof. I'm not sure it's necessary, yet it can't hurt. So I've been lining them with duct tape and giving them a quick spray of Scotchguard.


Off topic tip: I've also used these strips to attach strong magnets to the inside of my baking cabinet, to hold a few dedicated measuring cups and measuring spoons.


The adhesive strips were placed on the diagonal, to hide them from view.


Here is the front of a tuna-can butterfly, with the adhesive strip attached to its back. I placed them so the wings would cover the strip-removal-tags. The metal is thin enough to bend forward if I need to get to the tabs and remove the butterflies.


Wiping the wall with rubbing alcohol prepares the surface for the command strip adhesive. (per package instructions.)


Here you can see our Butterfly Verification Assistant, carefully executing the Critical Butterfly Count (CBC) . The CBC is a vital step in Butterfly Placement Assessment. We passed.

Be sure to test the door movement before attaching the fabric cover.


Here is the completed project, in use:


Monday, December 17, 2007

It's time to abolish the draft. (Creating a draft dodger.)

The drafty door between our unheated mudroom and our kitchen has been driving me nutty!

The tile floor was too cold for bare feet, and I could almost see the money from our heating budget seeping through the crack!

This morning, I finally fixed it. Here's how I did it.


First, I measured the door in units of empty paper towel tubes. Since they had to fit inside one another to form one long tube, the total length (of three tubes for my door) had to be a bit longer than the width of the door.


I fit the three tubes together, folding one to fit inside the other, forming a "supertube". These were attached with a ring of glue from a hot glue gun, along the inside of the outer tube.

Using a chopstick and a broom handle, I stuffed the supertube with plastic grocery bags, packing them tightly.


On the door flashing, I placed a super-strong magnet on each nail. Then, I put some hot glue on the magnets, and quickly pressed the stuffed supertube onto the glue-y magnets.

The result is a supertube that attaches to the (nails in the) flashing, magnetically.


This project requires the strong magnets, because the flashing is aluminum (not attracted to magnets), so the tiny nail-heads are the only metal for holding the whole supertube. In order to work properly, the attraction has to be strong enough to hold up to frequent door opening.

For doors without flashing or metal, see the next post for what to do.


When opening the door is tested with a full length supertube, it will knock the supertube off, due to interference from the corner/end piece.

Trim the end piece just enough to allow the door to open easily, allowing the maximum draft-covering length to remain.


I needed about 3/4 of an inch of clearance.


Then I covered the supertube with fabric, using the glue gun. I was careful to leave only one layer of fabric over the magnets, to avoid interfering with their hold capacity.


This was a very quick project, using materials on-hand and about 10 minutes (including photographs.) The frog fabric was from my stash, purchased on clearance at about $2/yard, and I used less than a quarter-yard. Scraps of sheets/tablecloths would work nicely, too. The total cost was under $2.

I wonder how many minutes of New England Winter it will take to recoup my costs from the heating oil bill?


It works very well, and our bare toes are grateful!


Stay warm, everyone!

Thursday, December 6, 2007

Chanukah candle magnets (craft for kids)


Here's a quick Chanukah craft for kids. We made Chanukah candle magnets by painting a couple of those promotional business-card magnets that seem to breed behind our refrigerator.

You can always buy the magnets if your junk mail supply runs low. There are also printableversions available if you need to make things in bulk, say for a birthday party or classroom activity.)


I used two junk-mail magnets to make this project. One magnet was cut horizontally into nine candles (8 chanukah candles + 1 for the shamash), and the other into 9+ flames.

Then my crack painting professional went to work. Glitter paint was used (not necessary, but nice) to make the flames "sparkle". (Note our standard painting setup: shopping bag taped to kitchen table and yogurt-container-lid paint palette.)

A carefully opened (so no sharp edges) and well washed metal can makes a fantastic storage container for play magnets. This one was from one of Costco's 4.5 lbs of tuna!

Since the container itself attracts the magnets, its outside can be used for play, while the contents don't spill when the can is knocked over.

By the way, if your child has one of those MagnaDoodle toys, you can extend the play value by using whatever magnets you have to use with it. Light magnets, such as the chanukah candles above, will stick to the device's surface. If removed, they'll make their shape.


You (or the children) can make all sorts of custom magnets (suggestions: Hebrew alphabet, shapes, numbers, stars, whole words, etc.) to use with it.

In fact, if using one of those toys, there's a lot of Chanukah play value to be had by taking a business card magnet and making just the one candle and one flame. No paint or drying time needed!

If you liked this article, congratulations! You have great taste. Please brew yourself a cup of coffee.
subscribe to Juggling Frogs