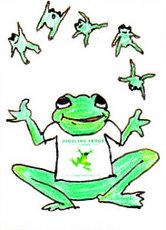
Need some ideas for Sukkah decorating projects?
Here are some of our family's favorite home-made Sukkah decoration craft projects:
I have received many requests for Sukkah projects in the past two weeks. Now that our Yom Kippur machzorim (holiday prayer books - here are my new favoriteSukkot is a reminder of man's lack of control of the physical world, and his vulnerability to the weather. We leave the comfort of our homes to live (or at least eat our meals) in a hut with a leaf-roof (called, "scach") for a week. In order for the commandment to be fulfilled, the scach has to provide shade imperfectly, allowing a view of the stars at night. We're sheltered, yet open to the elements.
When the weather cooperates, we enjoy our soup despite a few leaves falling in it, and in the company of neighborhood squirrels and yellow-jackets. When it rains, we're not obligated to stay in the Sukkah, but all the decorations and crafts are off-limits for handling.
This means that the decorations will be subject to rain, wind, and (at least here in Boston) perhaps even snow. So, while we adorn the Sukkah with decorations, we need them to be waterproof and inexpensive, as well as beautiful.
The holiday of Sukkot is also at the tail-end of a month-long marathon of holidays. It starts four days after Yom Kippur. In that time there is much to do: building the Sukkah, obtaining a lulav and etrog, cooking holiday food.
Thus, home-made decorations need to be easy and not very time-consuming.
The challenge is to find Sukkah decorating activities that are cheap, easy, fast, weather-proof, beautiful, appropriate for the holiday, not too messy, and can be accomplished by groups of children with a wide age range.
One strategy that works for our family is to use the summer to make some crafts for the Sukkah. This allows for more involved projects, and for paint to dry. In the summer, the days are long, and there is time to indulge in elaborate multi-step projects.
This isn't always possible or desirable. Often, we need to have Sukkah decorating art projects to make with large groups of children, either to decorate our synagogue's Sukkah, or as a classroom activity.
Sometimes, we just want to have the projects made closer to the holiday to make it relevant for the children.
Sometimes, we need to fill an empty space to replace decorations that were blown away or waterlogged last year.
My favorite projects involve all the children, like this banner made from the kids' hand prints. It was quick and easy to make.
To make it, let each child choose a color of fabric paint. Encourage them to choose dark colors that will show up at a distance.
Work with one child at a time, one hand at a time. Using a paintbrush, cover the child's entire hand with fabric paint. Ask the child to relax his hand, and press down firmly on all the fingers. Draw stems and make a pot. (Pot = trapezoid with long side on top, and a thin rectangle longer than the long side of the trapezoid just above, touching the trapezoid.)
Don't forget to write the date in fabric paint!
Six years ago, I bought this huge container of fusible beads for $11. We have used them for more crafts than I can count, for community events, and for birthday parties. We still have half the bottle left!
The beads are tiny colorful plastic tubes that melt when ironed. The system includes a rigid heat-resistant plastic plate with many tiny pegs. The beads are placed on the pegs, touching each other to the desired pattern.
When the pattern is complete, a piece of wax paper is placed on top (gently and carefully) and the beads are fused through the waxed paper with the iron. They melt and fuse together in about a minute of ironing.
I like to flip them over and fuse the back side as well. Don't forget to use the waxed paper in between the beads and the iron, or the iron will be covered in melted plastic, perhaps ruined.
Crafts made with the fusible beads will stand up to many seasons in the Sukkah, exposed to the elements. To make the decorations easier to put up, remove, and store, it helps to invest some time attaching them to something else that hangs.
Try to avoid using bare wire coat hangers, because they rust in the rain.
The stars in the picture to the left were made by different children over different years. At some point, I collected them, inserted a jump ring in the top, and strung them with plastic lanyard. To keep the stars evenly spaced from year to year), thread the plastic lanyard through a pony bead, then through the jump ring, then back through the pony bead.
Before I had children (back when I had copious spare time on my hands!) I used the same type of Perler fusible beads to make
this sentence, one letter per square (hanging at the bottom of the picture to the right):
הזורעים בדמעה ברינה יקצורו (He who sows in tears will reap in joy)
(I'll try to update soon with a downloadable template for the letters.)
Hanging above that are painted wood shapes in the form of the moon and stars. These are available at craft stores for 10 cents to 25 cents a piece. Paint them, drill a hole at the top, and string beads on plastic lanyard to hold them.
We put the Ushpizin names on the stars.
 For items painted with acrylic paint that you'd like to keep for multiple years, it can be helpful to spray them with fixative when they're dry. This will make rainwater bead up and not penetrate.
If you choose to use the fixative, wear gloves. That stuff does not come off skin, even with most household solvents. Ask me how I know.
Here is another set of letters, spelling out "baruchim HaBaim", or "Welcome". My son, Jonathan, made it when he was about 10 years old
 with the fusible beads.
Here is a closer view of the painted wooden shapes.
The birds, butterflies and dragonflies are each painted, drilled, fitted with jump rings, and attached via a length of clear plastic lanyard to one long 2" wide fabric ribbon. (The fabric ribbon isn't visible in the photo because it's behind the wood plank.)
The top of each lanyard is threaded through a hole in the middle of the width of the ribbon, and secured with a square knot.
The ribbon is hung at both ends. This allows a few dozen painted shapes to be hung (and removed) at once. It would take forever to hang them individually.
It is fun to watch all these flying animals sway in the breeze.

On the outside of our Sukkah we have a very large banner made from a tablecloth. It is 5' wide by 12' long. I call it the "Simcha Banner".
This was made by masking the width of both borders with pieces of paper all around, and placing large cut out letters in the middle. They spell out "zman simchateinu, mikrei kodesh , zecher l'tziyat mitzrayim" (Time of our rejoicing, sanctified, a remembrance of leaving Egypt.)
The banner then was spray-painted blue over the message.
When it was dry, newspapers were placed over the middle part, and the border was spray painted beige.
After the beige border dried, the inside half was covered with paper, and the outer border was spray painted purple. Then all the papers were removed, including the letters in the middle message.
The letters were filled in with bronze paint, and a bunch of biblical sentences about simcha were written in blue on the beige border. It's very hard to see, but the purple outside border was stamped all over with one of Shulamit Ron's stamps that says "moadim l'simcha". 
Sentences around the border of the Simcha Banner include:
- Ivdu et Hashem b'Simcha. (Serve G-d with joy.)
- Or zaruah l'tzadik, v'lyishrei leiv simcha. (Light is sown for the righteous, and joy for the upright in heart.)
- Moadim L'simcha, chagim v'zmanim l'sasson. (Festivals of joy, holidays and times of gladness.)
- V'Samachta b'chagecha v'hayita ach sameach. (Rejoice in your holiday and be very happy.)
- Od yishama be'arei Yehudah uvechutzot Yerushalaim: kol sasson, kol simcha, kol chatan, kol kallah. (It will be heard in the cities of Yehuda and in the neighborhoods of Jerusalem, the voice of gladness, the voice of rejoicing, the voice of the groom, the voice of the bride.)
I put grommets all around, and voila!
In this picture you might be able to see the stumps of the tree branches that had to be removed last year. From this angle, it looks like a normal tree, but from
the side it looks like half a tree! (In order for the Sukkah to be kosher, it can't be in the shade of a tree.)

Every year, we try to make a few new permanent crafts for the Sukkah. However, the bulk of crafts made each year are not so long-lasting.
The kids draw many pictures to adorn it, and we encourage them to do so. Here is where rain can be our friend. If every craft lasted forever, we wouldn't have room for a table!
Something I've found very helpful over the years is chain, the length of the Sukkah, fitted with clothespins every third link.
I attach it securely along the railing. A standard 8.5"x11" paper, held in landscape format, can be held with three clothespins. If held in portrait format, it takes 2 clothespins.
This chain can hold all of the last minute paper decorations that the kids make. Since it is about 3 feet high, and since clothespins don't require adults or knots, the children can hang their own work. This helps a lot.
Above the chain you can see the beaded chains. These were made by the children from pony beads (very inexpensive, waterproof, and easily for small children to manipulate, due to their large holes) strung on plastic lanyard.
To make it long enough to drape, plan for the finished beaded length to be about 150% of the length it will reach.
The banner that says "Ufros Aleinu Sukkat shlomechah" (Spread over us Your Sukkah/shelter of peace.) was made by a group of the children.
We put paper-cut-out letters on the banner.
Then they cut leaf shapes from kitchen sponges and sponge-painted over the paper letters in Autumn colors.
When the paint dried, the paper letters were removed and the shapes that remained were outlined in fabric paint.
Of course, the ultimate in one season use Sukkah decorations is the ubiquitous paper chain.
Every year, when I pack up the decorations after Sukkot, I prepare a bunch of 1.5" strips of construction paper, stick them in a bag, and place them on top of the decorations box.
This way, the children will have at least one craft's materials prepared and ready to go as soon as we open the box next year.

Believe me, if you do this, you will thank yourself next year.
I hope to post a detailed tutorial for these recycled craft mobiles soon.
The stars are shapes cut from the tops of plastic produce containers (such as blueberries, grape tomatoes, etc.)
These clear plastic shapes are then soaked in soapy water to decorate the Sukkah: remove the product label and a hole is punched on top.
The horizontal bar is made from a Popsicle stick. Drill tiny holes in the Popsicle stick with an electric drill for the ribbons to thread through, and it will hold up to the wind nicely.
The painted shapes are attached to the Popsicle stick with curling ribbon.

The big gold banner in this picture has a picture of a lulav and etrog, and "Hodu L'Hashem Ki Tov, Ki l'olam chasdo."
This is what we say when we shake the lulav during the Hallel prayer (hymns of praise) during the holiday.
The smaller "banners" below, along the railing, were made from dinner napkins.
(For Jonathan's bar mitzvah a few years ago, it turned out to be cheaper, easier, and less frustrating to buy tablecloths and cloth napkins in bulk, than to rent them from a linen service.
After the bar mitzvah, I washed them, and have used them for multiple other events since then. I hope to use them for the girls' bat mitzahs, too.
Whenever the white dinner napkins get stained, we use them for crafts like this.)
These 20" square napkins are the perfect size for children to decorate with fabric paints, tie dye, etc. I set grommets in the top corners to make them easier to hang. Every year, we add to the inventory of these smaller banners.
===================================
For more Sukkot projects, click here.
===================================


11 comments, so far. Add yours now!
Post a Comment
I'm sitting here in awe. We've been making paper chains despite the fact that it has been raining here for 3 days straight and I am worried we won't even have a chance to put any of them up. (I've been ignoring the fact that they will not hold up to the weather.) You have given me lots of ideas and it looks like at the very least we will have some fun Sukkot craft projects even if we can't put them all up in the rain! Chag Sameach!
Came here through Ezzie's blog...what an amazing and helpful collection of ideas! Thanks!
what a great post, thanks. we are always looking for new decorating project ideas, but i'm usually so exhausted after yom kipppur...i love the idea of working on it in the summer. i'll put it on my list! my favorite tip is the clothespins, though. thanks! chag sameach...
JF -I just can't thank you enough for blogging! I think i'm going to use that hand flower pot idea w/ the kids its gotta be a winner. I also want to do the leaves one. But Israel may not have all those leaves. I'll have to improvise a bit...
JF -I hope you know you and your talent are appreciated!
We have used both foam 'paper' as well as vinyl (the kind that comes in colours and prints, and is sold on a roll) from which to make our chains. They last over the years!
Chag same'ach!
Sukkos is such a great time for your talents to shine! Enjoy your beautiful sukkah!! Chag Sameach!
Hi ! Just found you through somone elses blog. Some great ideas here. I think I'll be back to check out some more. I especially like the fused beads with the lettering. Very clever and effective looking.
use foam for chains - they last from year to year... and you can use foam stickers and make them more exciting!!!!
We have had lots of success making "water proof paper chains" by cutting strips from craft foam sheets and stapling them together. We also buy wire hooks sold for Christmas tree ornaments, these work great to attach to the lattice of our sukkah and they easily thread through the decorations made with foam sheets (we cut our and decorate lots of shapes with it, I use cookie cutters to indent the shape for easy cut out for the kids) and the fuse bead projects are easy to hang with the wire.
Thank you so much for this great site. I am now bursting with ideas and just need my kids to come home to get started! It is so great to see so many original ideas in one place. Chag Sameach.
Thank you so much for your ideas. I have six children and they are thrilled to start crafting. In the past I have used plastic page protectors to hang the children's art work up. They can handle a little rain and the damp mornings.
Thanks again.
Post a Comment