Thursday, December 6, 2007

Chanukah candle magnets (craft for kids)


Here's a quick Chanukah craft for kids. We made Chanukah candle magnets by painting a couple of those promotional business-card magnets that seem to breed behind our refrigerator.

You can always buy the magnets if your junk mail supply runs low. There are also printableversions available if you need to make things in bulk, say for a birthday party or classroom activity.)


I used two junk-mail magnets to make this project. One magnet was cut horizontally into nine candles (8 chanukah candles + 1 for the shamash), and the other into 9+ flames.

Then my crack painting professional went to work. Glitter paint was used (not necessary, but nice) to make the flames "sparkle". (Note our standard painting setup: shopping bag taped to kitchen table and yogurt-container-lid paint palette.)

A carefully opened (so no sharp edges) and well washed metal can makes a fantastic storage container for play magnets. This one was from one of Costco's 4.5 lbs of tuna!

Since the container itself attracts the magnets, its outside can be used for play, while the contents don't spill when the can is knocked over.

By the way, if your child has one of those MagnaDoodle toys, you can extend the play value by using whatever magnets you have to use with it. Light magnets, such as the chanukah candles above, will stick to the device's surface. If removed, they'll make their shape.


You (or the children) can make all sorts of custom magnets (suggestions: Hebrew alphabet, shapes, numbers, stars, whole words, etc.) to use with it.

In fact, if using one of those toys, there's a lot of Chanukah play value to be had by taking a business card magnet and making just the one candle and one flame. No paint or drying time needed!

Wednesday, December 5, 2007

How to make a Chanukah menorah (chanukiyah) from a foil pan

Caught without a menorah for Chanukah? Here's a way to make one with one foil pan, some chanukah candles, and a scissors. No other tools are necessary

While this is not an activity for children (the foil's sharp edges can cut skin), or an heirloom-quality craft, it might be useful when stuck in a hotel room on Chanukah due to a cancelled flight, for a hostess to make a few extra chanukiyot when faced with an unexpected crowd, or just to have a McGyver moment.

One of these can be made in about five minutes. Beware that a few candles are likely to be break during the making of this project. If you don't have enough candles to sacrifice a few extras, then substitute a pen or pencil for the candles in these instructions

I've made and used a few of these, and the candles were held securely. It's always a good idea to melt the bottoms of the candles a bit to help them stay upright. (Please use your judgment before playing with fire: Never leave fire unattended. Don't put the menorah directly on a flammable surface. Stop hitting your sister. Now go clean your room.)

STEP 1. I start with a half-size steam-table pan. In the U.S., these are sold at Costco for about 26 cents a piece, in 30-quantity. A larger pan would work, but a smaller pan is unlikely to yield enough space between the candles, or enough foil to hold them well.


STEP 2: Most pans have ridges along the sides. I used these as a guide to cut eight strips (still attached to the bottom of the pan) from the straight part of the side of the pan.

These cuts should be roughly evenly distributed, such that the eight strips are approximately the same width.

Cut off and discard the curved side edges adjacent to the eight strips.


STEP 3: Cut off and discard the two shorter sides of the pan, keeping the entire bottom of the pan. The bottom will be wider than the part with the eight strips (because of the discarded curved part from that piece.)

This is desirable, because it gives extra foil for folding the edges. Unfolded edges can cut skin, so we want all the edges on the finished menorah to be folded.


STEP 4: Fold the strips in toward the bottom of the pan, along their natural crease.


STEP 5: Fold each of the strips back over itself, toward (what was) the outside of the pan. The result should be a strip folded in half that stands upright.

STEP 6: Fold the upright half in half, so that it has a folded edge on top, and is a quarter of the size of the entire strip.


STEP 7: Using a candle as a guide, wrap the folded quarter of foil around the candle to form a candle-sized holder.


It will seem a bit flimsy at this point, but don't worry; when the rest of the folds are made, it will be more secure.
Repeat this for all of the eight strips.


STEP 8: Fold the edge to the candle holders. The result is a reinforced edge one half the width of the original distance between the edge and the candle holders.


STEP 9: Lift up the folded edge, folding it to touch the candle holders. This folded edge will give stability to the line of candles, and keep them vertical.

STEP 10: Fold (what was) the foil pan's bottom in half lengthwise, toward the candle holders.

The half of the pan closest to the line of candles will be the bottom of the menorah.

The half of the pan furthest from the line of candles will be the back of the menorah.

STEP 11: At this lengthwise fold, use a scissors to make a cut (parallel to the line of candle holders) on either side of the menorah, the width of the extra foil (mentioned in STEP 3).

The goal is to make a folded edge on the sides, to avoid sharp edges in the final product. The cuts allow the bottom of the menorah and the back of the menorah to have this edge folded more easily.

Fold the extra foil on the sides of the menorah's bottom towards the bottom of the menorah.


STEP 12: Cut away all but one double-width strip from the other/remaining side of the foil pan. This is going to become the candle holder for the shamash. (Hereafter referred to as the "shamash strip".)


STEP 13: Fold the back of the menorah in half, toward the inside-bottom of the menorah. This will result in menorah back that is one-quarter the width of the original pan's bottom, with a folded edge on top.

As you do this, keep the shamash strip available for folding; prevent it from getting folded in between the folds that compose the back of the menorah.

STEP 14: Fold the shamash strip in half toward the edge where the back of the menorah meets its bottom.


STEP 15: Unfold the back, and cut away one quarter of the width of the shamash strip on either side of its inner half. The result will be a shamash strip in a T-shape. The trunk of the T will be half the width of the top of the T.

(I'm holding it upside-down in the picture below.)


STEP 16: Refold the back and shamash strip to the configuration at the end of STEP 14.

(This picture is of top view.)


STEP 17: Fold the shamash strip toward the back, so that the top of its T shape stands upright and perpendicular to the surface of the bottom of the menorah. The trunk of the T shape will still be against the bottom of the menorah.

STEP 18: Fold the top of the T in half, and wrap this folded part around a candle.


STEP 19: Lift the T-trunk up, raising the candle holder for the shamash. Fold its bottom to secure.
STEP 20: Fold over the edges of the back, toward the back of the menorah.

Voila! You're done!


BONUS STEP: If you have a glue gun and a pencil, you can make a quick embellishment from one of the discarded pieces of foil. Be careful, as it has sharp, unfolded edges.


I wrote out the word "Chanukah" in Hebrew, using the edge of the foil pan upside-down, such that its rim was a straight edge to support the result.


Cut away the excess and use a glue gun to attach to the top of the menorah.


Here's wishing a Happy Hanukkah to everyone!

Winners! We have winners!

In order to determine the winners of the "Can I have a Cell Phone for Hanukah" book Giveaway, I employed a Random Number Generator.

And here she is. RNG, please take a bow:


Our methodology involved assigning numbers to each contestant, a bunch of ping pong balls, and a permanent marker.


I believe in the inherrent fairness of this method, as the Random Number Generator doesn't know her numbers yet. (She can count things to 5, but doesn't reliably recognize the symbols yet.)

Also, since she can't read and doesn't have e-mail, she was unswayed by any vote-tampering efforts on behalf of the potential winners.


Congratulations to the winners of the "Can I have a Cell Phone for Hanukah" book Giveaway!

Thanks to everyone for entering! (I really wish I could have sent books to everyone.)


Thanks again to Sharon Estroff and Broadway Books for providing the copies of this book to give away to Juggling Frogs readers.

Happy Hanukkah!

Fantastic article about Challah

Ted at "Help! I have a fire in my kitchen" has turned a couple of recipes from this blog and others into a fantastic, informative, must-see article about Challah, called "The Magic and Mystery of Challah".

Not only did he pull together tidbits and recipes that was scattered in many sites into one comprehensive article, but he has added a lot of new information and filled in the gaps. He defines and explains things that were left out, due to Jewish or baking knowledge assumptions.

Ted's challah article draws you in like an infomercial**, making you want to jump up from your chair and act on that information. If you're not baking your own challah after reading "The Magic and Mystery of Challah", then you're just not paying attention.

Thank you, Ted!


** I mean this in a good way: It draws you in like the best copy-writing.

Friday, November 30, 2007

Shabbat Shalom!


Shabbat Shalom! שבת שלום

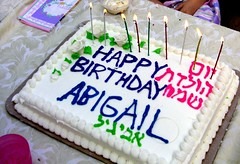
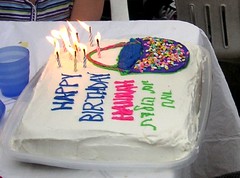
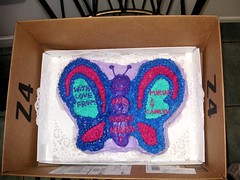
(Just above the cakes you can see cornbread baked in my new favorite baking toy, a pan that lets everyone in the family get that coveted edge piece.)

Please note: this blog is not updated on Friday nights or Saturdays. Comments made during this time will be put in a queue, to be moderated after Shabbat.

My ears are red: There are a number of blogs that have mentioned Juggling Frogs during my stomach-juggling absence. I'm still digging through a backlog, but hope to respond soon:

Also, Rav Soloveitchik's Two Dreams at Hirhurim relates the point that just as the angels going up and down on the ladder in Jacob's dream were not two separate dreams, but components of one dream, so too, Rav Soloveitchik's mastery of both secular and Torah scholarship are but separate aspects of a single vision.

This post made me smile, imagining an updated version of Jacob's dream. Instead of a ladder, the angles were going up and down a conveyor belt, all attached to the same device, part of the same mechanism, but resulting in individual angels oriented in opposite directions.


---


Thank you again and again for all of your kind wishes and thoughtful comments. It's good to be back. I missed you, too!


Shabbat Shalom! שבת שלום

How to make a bulk cookie cutter from tuna cans

Have a cookie making marathon in your future? Invest a few minutes and make a bulk-cookie cutter, and save tons of time.

This bulk cutter uses the dough efficiently, and allows a bunch of cookies to be cut at once. The only difficult part is eating all that tuna!


I used the following materials:

  • seven cans of tuna (eat the tuna and wash the cans)
  • 18" heavy duty aluminum platter (rescued from a catered community event, but too large to fit in my oven's drawer!)
  • seven 1.5" brads
  • duct tape
These are the tools I used:
  • drill with bit smaller than the head of the brads used
  • scissors
  • pliers (helpful for bending the foil pan, but not strictly necessary)
  • pen that marks on foil pan (e.g. Sharpie/permanent marker)
  • glue gun (optional, probably unnecessary)
Instructions:

STEP 1: Collect and thoroughly wash a number of tuna fish cans.

I soaked mine for a few minutes in hot water that had some lemon juice added to remove the fishy odor, then ran them through a dishwasher.

STEP 2: Drill a hole in the center of the bottom of each can.

STEP 3: Mark the hole locations on the foil platter, grouping the cans as close together as possible.


STEP 4: Drill holes in the platter at the pen marks.


STEP 5: For each can, feed a brad through the hole in the can and the corresponding hole in the platter. Open the brad on the back of the platter, pull tight and curl the "legs" of the brad to secure. The cans should be able to spin, but not wobble.

STEP 6: (Optional) I put a dot of hot glue from a glue gun on the back of the platter, to help secure each brad. This was probably unnecessary, but can't hurt.


STEP 7: Cut the platter from its edge to the outside of the can, for each of the outer-most cans. (There are six outer-most cans in this configuration.)

STEP 8: Fold two opposing "leaves" cut from the platter over the back of the platter.

The idea is to reinforce the strength of the cutter and make it safe for pushing with palms (no sharp edges) when in use.


STEP 9: After the initial two edges are folded in, snip (with scissors) a wedge from the edges of the remaining flaps (to reduce bulk) and fold them in to the back of the platter.

I used a pair of pliers to help with the folding.

Make sure all sharp edges are removed and folded. Your hands will be pushing on this device, and those snippets of aluminum can cut skin!


This is the shape of the wedge removed from the flap sides. With six cuts, I had six flaps and six wedges.

STEP 10: When all the flaps are folded over, crimp the folds with the pliers and cover the exposed edges with duct tape.


STEP 11: Whip up some cookie dough and go to town!


This worked well, and it's sturdy enough that I plan to keep it indefinitely. I drilled a hole in the edge so I could hang it on my basement stairwell wall, where I keep most of our other baking pans. (This is a storage strategy that allows all the pans to be visible, while freeing up considerable cabinet space.)

Here is a picture of it (bottom center of the photo) hanging on the Wall o'Pans:


(Update: Wonder what to do with the lids?)

If you liked this article, congratulations! You have great taste. Please brew yourself a cup of coffee.
subscribe to Juggling Frogs