I've conquered an obsession. Well, sort of.
The victory isn't really over my napkin obsession, but rather over the storage of its resulting output.
As I've mentioned, I have a "thing" for making dinner napkins. Maybe it's a clever and frugal way to add a touch of personality and elegance to our table. Or perhaps it's a barely controlled obsession. Most likely, it's a flimsy excuse to fondle fabric.
We have a lot of napkins.
We have dedicated dinner napkins for many holidays. I have matzah-napkins for Pesach, fall foliage napkins for Sukkot and Thanksgiving, Chanukah napkins, and Purim napkins made from a wonderful Robert Kaufman "Mardi Gras" fabric.
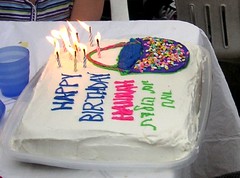
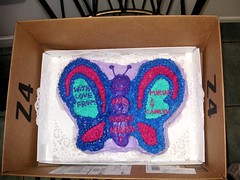
I make them from (often clearance-table) novelty fabric in the children's birthday party themes. As you can imagine, with five children, a number of the themes have been repeated for multiple parties, an added bonus. We have napkins with cats, princesses, ducks, horses, dolls, Winnie the Pooh, numbers, machines (for Jonathan's "engineering" themed 10th birthday party), butterflies, various sports, bears, and bats (the winged mammal).
I've also made a bunch of generic birthday and celebration napkins, just in case time, inspiration, or the fabric store is unavailable.
I have sufficient out-of-the-way storage for these "special occasion" napkins. I even have room for a few more birthday themes, just in case someone chooses something not covered by the above list. The children enjoy re-using their special napkins throughout the year, as a special treat, for minor celebrations, such as a great test score, or to make the breakfast table special for a sleep-over friend. It isn't hard to retrieve them for special occasions.
The storage problem was with our everyday/shabbat napkins.
I find it hard to pass by a beautiful fabric on the clearance table without considering how it would look as dinner napkins. When a favorite tablecloth tears or stains, it's hard not to salvage its remains for the napkin stockpile.
Thus, the stash accumulates.
For the past seven years, I've kept the everyday napkin cache in a free-standing shoe organizer, on a high shelf in the mudroom. Each shoe-hole holds about 3 dozen napkins. It worked well enough, but it was a bit too high up for the children to reach (I have to stand on a chair to reach the top compartments), and the build-up surplus hoard inventory has outgrown it.
Until this week, the only solution I've seriously considered is a Twelve-Step-Program. (Hello. My name is Carolyn and I'm a napkin-o-holic.)
But therapy will have to wait. I've found a much better answer, the offspring of the marriage of my napkin hoarding and my other favorite obsession: recycling packaging materials.
After 13 years of sending my kids to school, I'm physically incapable of throwing away an empty egg carton or tissue box. I get hives when forced to discard plastic berry containers. It's not that I'm such an environmentalist, but rather that I'm in touch with my Inner Toddler: I often enjoy the box as much as its contents.
It's not only my fault. The teachers are complicit. They encourage and reward my hoarding behavior, accepting this stuff gratefully and sending the children home with fantastically creative and educational projects made from it all. When I see what they can do with a paper towel tube, it becomes impossible to throw one away.
One reason I don't home-school, is that I need the school as a recipient of my bounteous collection of egg cartons, berry boxes, fabric scraps, shopping bags, oatmeal canisters, and bottle caps. We'd have to rent an apartment, leaving our home to house the warehouse of "good garbage" if I had no way of reducing its stock.
That is why I just happened to have, on hand, over a dozen empty Kleenex boxes.
On Tuesday morning, I moved the Kleenex box pyramid designated for the kindergarten from the dining room table, in order to sit down with a great audiobook and finally attack the napkin ironing backlog from the holidays.
(Our dining room table has a heat-resistant pad on it. I put a tablecloth on the table on top of this pad, and do my ironing on top of that. This gets the tablecloth ironed "for free", lets me sit at a comfortable dining room chair when ironing, and allows me to use the entire surface of the table as a huge ironing board.)
So, I moved the boxes to our front hallway to await their transformation to objects d'arte.
This hallway is about eight inches wider than its doorway, leaving a dead space of about 5.25" on one side and 2.75" on the other. I know these dimensions by heart, because I've measured dozens of times in the eight years we've lived in this house. Wasted space in such a central location bugs me, in principle.
Finding a 5" deep shelving unit and a useful purpose to match this spot had eluded me. Until Tuesday morning.
Gretta looked at me curiously as I squealed in satisfaction at two simultaneous wonderful discoveries: The Kleenex boxes fit perfectly in the hallway, and the ironed napkins fit perfectly in the Kleenex boxes. She followed me upstairs, as I collected supplies, including a pair of 30" x 40" foam core boards (cost: about $11).
Her excitement matched mine, until she learned I wasn't building yet another dollhouse, but rather something for myself.

 I'm (almost) embarrassed to admit how happy this made me. The napkin overflow is stored conveniently, the hallway dead space is used, and the Kleenex boxes are recycled. And I can pretend that I don't qualify for a jacket that ties in the back for just a bit longer.
(Construction details that made this work:
- Brick "legs": The bottom shelf is mounted two inches above the bottom and back walls, allowing "legs" made of stacked bricks to hold it stably in place.
The depth of the foam core & Kleenex boxes is just as wide as the hallway, but about half an inch wider than the hallway at the floor, due to the floor wall boards.
The brick "legs" are just taller than the floor wall board, allowing for the floor under the foam core shelves to be swept. - Fabric cover is not yet finished/hemmed, as I hope to install a "real" wood shelf with brackets about a foot above the foam core, and cover that. This will give another shelf of storage, and prevent heavy objects from being placed on the foam core structure.
- Fitted top shelf: Above the foam core shelf, I made a separate layer of foam core, cut to fit exactly inside the molding and with a rounded edge at the corner. This made the shelves look built-in, when hidden by the fabric.
- Picture hangers: The foam core shelves are secured to the hallway wall by a pair of picture hanging hooks, poked through the back of the foam core about 5" from the top shelf, each about one-third of the width from the edges. I experimented with picture wire, but it made a gap between the wall and the structure. Hanging it directly on the hooks was more secure.)


4 comments, so far. Add yours now!
Post a Comment
Wow. Wow. That's about all I can say, Wow.
You are the coolest, most awesome, super-woman-mom EVER!! You are my hero! I'm so impressed! Wow! Please post another picture when you finish, I love it! And the Bread Cornucopia knocked my socks off! Too wonderful!
Can I make my own napkins without a serger and/or sewing machine?
Hello, you can totally sell these gorgeous napkins on ebay! Then you can really indulge this obsession/hobby guilt-free! I wonder how much they would go for... :)
Preemie Twins' Nanny,
You are so sweet, and you give me too much credit. But that won't stop me from printing your comment and pasting it in my notebook, as a cushion for the next time I feel like the nerdiest, most awful, incompetent mom EVER!
Thank you!
Ayelet,
Machines certainly make it quick work, but are not required. For Shabbat napkins by hand, cut squares 2" bigger than desired, press 1/2" hem, then fold it over again, and stitch.
If I wanted to make birthday party napkins by hand, I'd cheat, and cut them with pinking shears to size. (No sewing.)
I've tried a number of ways to mark the fabric for cutting: Quarter-inch-wide masking tape is quick and easy. My preferred method is to use a template made from a cardboard or poster board, and use the selvage/printed pattern edge as a guideline.
Rina,
I've given some as gifts, and to the school, but mostly just hoard them for our own use.
The napkins look best when pressed. If we've had company, it takes about twenty minutes per week to iron them. But, (as often happens) if life gets busy, we can go for many meals without running out!
Then, when I get a chance, I spend an hour or two, ironing while chatting on the phone, listening to a book on tape, or (less fun) on hold with the insurance company.
If I sold them on eBay, I'd have to keep up with the laundry!
Post a Comment