Tuesday, July 8, 2008

My knife block overfloweth

Recently, I acquired a few more knives than my narrow (and infamous) knife block could hold. One of them is a 10"chef's knive, which didn't fit in any of the slots of the existing block. I shopped a bit for a bigger block, but all those that held 10" blades were very big, and/or very expensive.

With children in the kitchen, I wasn't comfortable with installing a big knife magnet. (I'm also not thrilled with the aesthetics of these. I think they make a home kitchen look a little angry and dangerous.)

Jealous of my counter space, I wasn't enthusiastic about trading a perfectly good block and folding money for something bulkier, I managed to come up with something that works really well for me:

I used high intensity magnets glued (via hot glue gun) to the top of the existing block. These magnets each have a 12 lb. pulling capacity, so the knives are securely held to the wood.

knife block to be expanded For each knife, I put two magnets: one for where the base of the blade meets the handle, and another for the tip. Since I used the actual knives as a guide, the result is a custom fit.

knife block with magnets to expand capacity These are my two most used knives, so it's convenient that they are the most accessible and easiest to put away.

knife block in situI'm really pleased with this setup. It cost $4.50 in magnets (half of the $9 package), works very well, and takes up no extra counter space. (Since it's so hard for me to throw stuff away, not having a leftover knife block to discard is a psychological plus, too.)

By the way, while browsing around for knife blocks on-line, I came across a great idea on one of the forums for substituting the "laxative" mineral oil from the supermarket for the mineral oil that is sold specifically to care for wood chopping blocks.

It's the same stuff, but more readily available, and $2/16 oz. bottle, rather than $8.95/8 oz.

(If the bottle comes with too descriptive a label, discretion might warrant decanting or a homemade label announcing "for the cutting board" - to avoid embarrassing situations with guests in the kitchen.)

cheaper mineral oil for wood cutting board

Monday, July 7, 2008

Cold brew coffee

A while back, I stumbled upon a passionate discussion of a cold brew coffee making device, and became intrigued with this method. However, I'm notoriously cheap thrifty, and couldn't see the sense* in paying $30 for a device that will hold a gallon of liquid at room temperature for a day, before filtering.

In fact, I happened to have a pound of ground coffee, a standard glass gallon jar and a manual coffeemaker** at home. Risking only wasted coffee and wasted time, I gave it a try.

It was wonderful! The coffee developed a beautiful crema as it brewed without gadgetry, without electricity, and without contrivance, overnight on the kitchen counter. The next morning, I filtered the result, using a regular paper coffee filter, and then diluted a bit of the result with hot water.

It was a great cup of coffee, without any bitterness or acidity.

This method yields many advantages:

  • no electricity required

  • no device required

  • the "coffee sense" stores for weeks in the refrigerator (or can be frozen in ice cube trays for longer term storage and/or use with iced coffee and/or flavoring other drinks***)

  • once a few varieties are made, different types of coffee can be served to different individuals simultaneously

  • each person can make his own cup to the strength of his own liking

  • once made, it is virtually instant coffee (that doesn't taste like instant coffee)

  • for iced coffee, it doesn't need to cool down

  • observant Jews can enjoy it on Shabbat (If you're an observant Jew and a coffee snob lover, Saturday mornings can be a bit of a challenge...)

  • the kitchen gets messy one time for a week (or two)'s worth of coffee drinking

  • less coffee is wasted because there is no need to brew an entire pot; each cup is brewed as needed

  • the big lump of coffee grounds can be dumped in the compost heap in one trip


Here's what I did:

I put a pound of ground coffee in a glass gallon container, and added enough water (about 10 cups) to fill the container. (Perhaps any non-reactive container would do, but I was hesitant to use plastic because it often changes flavors.)


I waited a day. Other websites suggested a minimum of 12 hours. I like my coffee strong, and wanted to experiment to see if a whole day would be too long. I didn't taste any bitterness or staleness after more than 24 hours.

I filtered it through the large manual coffee filter, lined with a standard paper filter. This needs to sit, unmolested, on the counter for a long time, up to an hour, to extract every drop... of extract. I use either a large measuring bowl or the decanter from the manual coffee maker to collect the result. I'm sure this can be done with any filtering method, including a big strainer lined with cheesecloth, "gold" coffee filters, etc.

Depending on the drinker's preference, dilute 4:1 (water:extract) 3:1 or 2:1. Enjoy!

Here are some others' approach and appreciation of this method:


Index of Recipes on Juggling Frogs


==========
* note: Apologies for the obscure and terrible pun. Some observant Jews, in preparation for Shabbat, will make something mentioned in the Mishna Berurah called "tea sense" (or "tea essence") which is a brewed tea concentrate, that can be diluted on Shabbat with hot water to make tea. For some, this is the only legal and practical way to have hot tea on the Sabbath.

Others allow tea bags to be used on Shabbat if in the "second" or "third" cup.

The cold brew method of making coffee is the equivalent of brewing a "coffee sense" which, to my knowledge, is not mentioned in any sacred text... yet.

==========
** I hope to post soon about why I travel with part of this device

==========
*** Some favorites include adding the "coffeecicles" to soy milk, milk, or cream for instant iced "lattes". Since the coffee cubes are very concentrated, they impart more and more flavor as they melt and the amount of other liquid decreases. This is the opposite effect of adding ice to a cold drink, which dilutes the flavor as it melts.

Sunday, July 6, 2008

Zero excuses, no promises, a million reasons, and one big apology

It has been six months (!) since I last wrote, and I am so sorry not to have kept this site up to date.

In November, this blog suffered from a "perfect storm" of unrelated circumstances that made it unwise, impractical, and beyond my capability to post. Thank G-d, most of these circumstances are happy ones.

I'm relieved to say that the need to stay silent no longer applies.

With your permission, I hope to resume regular posting immediately.

I apologize for any e-mail messages and comments that have not yet been answered. If you are waiting for a reply to a comment from an old message or post, please let me know that it is still active.

Thank you for your enduring patience, your readership, and understanding.

Friday, December 28, 2007

Shabbat Shalom!

Please note that on Friday afternoons until Saturday evening, the author of this blog is unavailable, in observance of the Jewish Sabbath.

Comments made during this time will be held in a queue, to be moderated afterward.

Thank you for your patience.


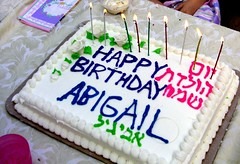
(The cake for Parshat Shemot is from a previous year.
I'm not baking this week because the family is away visiting relatives.)

Shabbat Shalom!


Just a couple of LINKS that caught my eye:

That College Kid provides a way of making a rss feed from any website. Suggested as a way for students to keep up with their professor's sites, but would be nice for keeping up with relatives' infrequently updated sites, too.

Who is wise? He who learns from everyone. Here's someone wise enough to learn from George Costanza.


I don't normally "do" resolutions, but if I did, I'd adopt Cheerful Oncologist's. He plans to raise his prices and stop prostituting his tastes.

Shabbat Shalom!

Friday, December 21, 2007

Shabbat Shalom!

Please note that on Friday afternoons until Saturday evening, the author of this blog is unavailable, in observance of the Jewish Sabbath.

Comments made during this time will be held in a queue, to be moderated afterward.

Thank you for your patience.

We made hand-shaped cookies (tracing the kids' hands from gingerbread cookie dough) in honor of the way Yaakov (Jacob) crossed his hands when he blessed his grandsons, Ephraim and Menashe, in this week's parsha. They are in the oven, so I won't get a chance to snap a picture in time for this post. Sorry! Stay warm and Shabbat Shalom!

===================

Some LINKS that made me smile, some that made me think, and a few that made me want to share...

Shabbat Shalom!

Wednesday, December 19, 2007

Son of a Draft Dodger and Charlie the Tuna

How to attach a magnetic draft dodger to a wood door:


The more it snows (Tiddely pom),
The more it goes (Tiddely pom),
On snowing.

And nobody knows (Tiddely pom),
How cold my toes (Tiddely pom),
Are growing.

-Winnie The Pooh, as reported to A. A. Milne


The draft dodger I made on Monday was so helpful, I've been making them for the other drafty doors in our house.

Magnets inside the draft dodger tube keep it attached as the door swings open and closed. In our mudroom, the magnets were aligned with the nails that held the door flashing.

Most of the doors in our house are wooden and without flashing. In order to use this design on non-metal doors, I could have stuck a few tacks or nails along the bottom. However, I didn't want to do anything permanent to the doors; I didn't want to mar their surface with nails, or risk misaligning the hinges by banging on them with a hammer.

Enter Charlie, stage right. Last week, he solved my vitamin-pill woes. This week, I called upon him to protect my chilly toes.

I used the same method as before, attaching (clean!) tuna can lids with leftover 3M command strips. These allow for a secure attachment, but a complete removal if necessary.

To improve the aesthetics, I cut them into butterflies and painted them. (What? You were expecting me to panel the house in tuna lids? )

The tuna lids cut easily, but have sharp edges. I'd recommend NOT using your best scissors for this activity.

I used Jacquard "lumiere" metallic and opalescent paints for this. I love these paints; they are a joy to use. I started with one of their "exciter" sample kits a few years ago, and fell in love with its rich, generous, high-quality pigment concentration and beautiful colors.

It is expensive paint, but I think it worth the price. Now I buy them in bulk either on-line from dickblick or dharma, or from the local craft store (when I have a coupon.)

Note the ever present bottle-cap paint pallets.

A commenter suggested it would be better if were waterproof. I'm not sure it's necessary, yet it can't hurt. So I've been lining them with duct tape and giving them a quick spray of Scotchguard.


Off topic tip: I've also used these strips to attach strong magnets to the inside of my baking cabinet, to hold a few dedicated measuring cups and measuring spoons.


The adhesive strips were placed on the diagonal, to hide them from view.


Here is the front of a tuna-can butterfly, with the adhesive strip attached to its back. I placed them so the wings would cover the strip-removal-tags. The metal is thin enough to bend forward if I need to get to the tabs and remove the butterflies.


Wiping the wall with rubbing alcohol prepares the surface for the command strip adhesive. (per package instructions.)


Here you can see our Butterfly Verification Assistant, carefully executing the Critical Butterfly Count (CBC) . The CBC is a vital step in Butterfly Placement Assessment. We passed.

Be sure to test the door movement before attaching the fabric cover.


Here is the completed project, in use:


If you liked this article, congratulations! You have great taste. Please brew yourself a cup of coffee.
subscribe to Juggling Frogs