This article includes instructions for making three types of doll house sized strollers from
Popsicle sticks and Must Gum boxes. (Any small cardboard box will do, such as the individual sized raisin boxes, or match boxes, etc. The box should be large enough to hold the baby dolls.)

In these instructions, the green stroller is a single stroller, the blue is a double side-by-side stroller, and the pink is a double front-to-back stroller.
We used a glue gun (handled by an adult or teenage child) because we're an impatient (not "inpatient" - Thanks, Margo, for both the correction and the giggles!) clan (where toy making is involved), but any glue will work, given enough drying time between steps.
The instructions for the single stroller are the most detailed, with the two double strollers as variations.
They are of a size that works with 1:12 (1"=1') scale sized dolls, such as Fisher Price/Preskool Loving Family or standard doll house sized dolls.
This project is predicated on the assumption that the wheels do not need to turn.
Warning: Sexist opinion follows. Do not read this section if such things offend you.
[begin sexist opinion]
I have found in my (admittedly statistically insignificant sample sized) children's experience, that girls don't care that their toy vehicles work. Boys care deeply that the axles and wheels work and make the vehicle go.
My son's first word was "car", and "truck" came shortly thereafter. His first verb was "vroom", as in "car, vroom!!!!" , or later, "Vroom the car, Mommy!"
Determined not to burden my firstborn child with environmentally imposed gender-specific assumptions, I dutifully bought dolls for him.
They all became either passengers or projectiles.
Jonathan's favorite toy vehicles were the ones that ran the fastest, straightest paths. He'd race them against one another; the winner of the race earned the right to lie on his pillow that night.
By the time the girls were born, our house was chock-a-block with toy
bulldozers, cranes, books and videos about construction work, etc. Of course they played with the trucks, but upon closer observation, it was clear that they played with them differently than my son and his male friends.
The girls would sit in a circle, each having chosen their favorite toy cars. The cars and trucks would talk to one another. They had relationships and dialog with the other cars.
Witnessing his former hotwheels kissing the other cars goodnight, my son, watching from the threshold of the girls' room, would roll his eyes and walk away in disgust.
Thus, this project depends on my girls' view of doll house toys. These strollers have wheels, but they don't turn. So far, after years and years of making them this way, nobody other than my son has noticed or complained about it.
[end sexist opinion]
So, if you have children of either gender who want strollers that can roll across the kitchen floor, this project is not going to satisfy them. But if your kids want strollers for their dolls whose
wheels turn only in their imagination, these will work nicely.
In these instructions, we have painted the individual steps, rather than gluing everything together first and painting the glued, completed result. This method makes for a tidier result (with all the nooks and crannies filled in with paint, and the inside of the stroller seat clean and unpainted white cardboard), and is quicker for mass assembly of many strollers, but takes longer when making a single stroller.
If we were doing this with a limited time, or a large group of children, we'd glue everything first and paint the result.

Materials used:
- For the stroller seat: Small cardboard boxes, such as Must Gum (a popular kosher brand of chewing gum), snack-sized raisin boxes, etc.
- For the seat belt: Twist-ties, or bits of pipe cleaners (also called 'chenille stems')
- For the wheels: Wooden discs (available at craft stores), metal washers, or (cheapest option, but bothers some people) painted pennies. Foam or paper circles can also be used, but will not be very durable.
- For the handles: Popsicle/wooden craft sticks or wooden coffee stirrers. We have also made many strollers from bits of broken plastic clothes hangers
- For the seat pad: Paper towels and bits of fabric..
- Also: Glue, scissors, paint, paintbrushes, clothes pins.
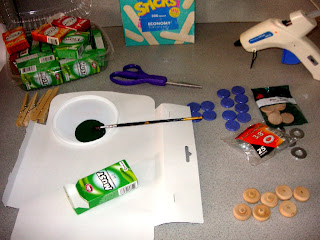
To make a single stroller:
- Use a clothes-pin to make a handle for painting the box. This will allow you to paint the box on all sides.
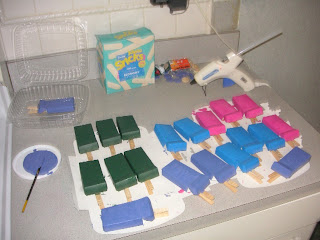
- Allow to dry.
- Cut out the face of the box.

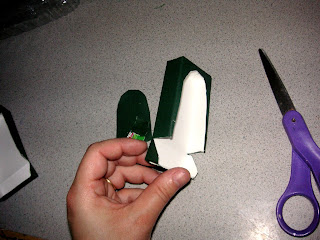
- Glue the middle of a twist tie inside the bottom third of
the box, parallel to the box bottom.
- Cut the top third with a diagonal cut from two craft sticks. The angles and locations of these cuts should be as close to identical as possible.

- Glue each cut craft stick to a whole craft stick, such that they are mirror images of
one another.
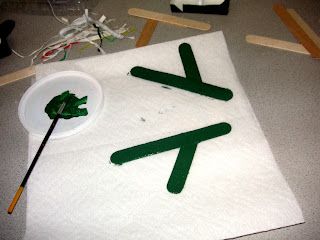 Add a segment (cut to fit) of another craft stick to make each of these shapes into a trussed (triangular) shape. This will give the stroller stability. Paint and allow to dry. We used a paper towel to protect the counter top from the paint. This paper towel will be recycled later in this procedure as the stuffing of
the stroller seat.
- Glue the shapes to the sides of the painted box/seat, and glue wheels to the sides. The wheels are decorative only, they won't turn.

- When everything is dry, the paper towel becomes the padding/stuffing in the stroller seat.
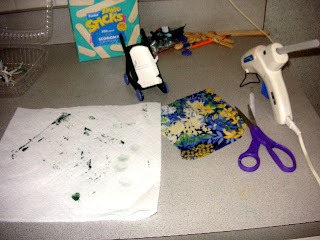
- Fold the paper towel to slightly less than the width of the box that was used to become the seat.
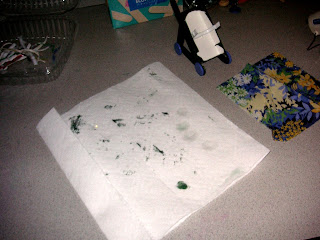
- Continue to fold again and again until the entire towel is used. Glue lengthwise to seal.
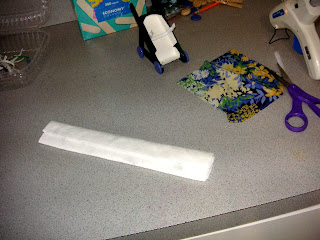
- Trim a piece of folded towel to the desired length of the stroller seat cushion.
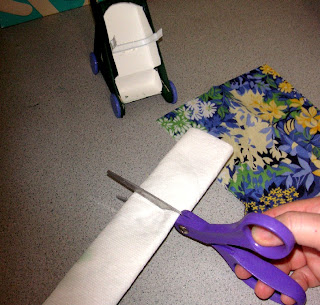
- Place the piece of folded towel seam side-up on top of the wrong side of the fabric scrap. (Thus, right side of the fabric and the smooth side of the folded towel are facing the work
surface.) Glue the sides of the fabric to the folded towel, like an incompletely wrapped gift.
- When flipped over, it will be an upholstered seat cushion.

- Glue this cushion in place, right side up, on top of the twist tie.

- Don't forget to test the final product!
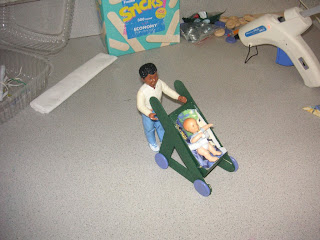
To make a double stroller (side-by-side style):
- Cut the faces of two painted boxes. They should be as close to identical as possible. We use the cut-out face from the first as a template for the second.

- Cut four craft sticks at the same angle and location, approximately one third from the top. Use one of them as a template to make sure they are as close to identically cut as possible.
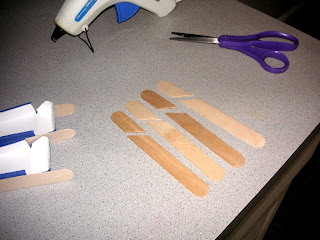
- Glue two of the cut sticks to either side of a whole craft stick. This will become the middle leg of the stroller, between the two seats.
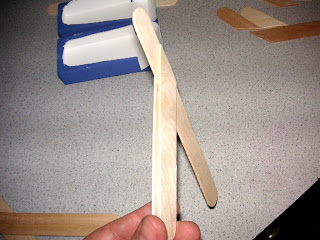
- Using this middle piece as a template, glue one of the remaining cut craft sticks to one side of a whole stick, to match one side of this middle piece, and the other remaining craft stick to the opposite side of a whole craft stick to match the other side of this middle piece.

- Glue a piece of craft stick, cut to fit to each of the three shapes. For the middle piece, glue this piece in between the two angled pieces.

- Paint the shapes and allow to dry.
- Glue the middles of matching twist-ties to the bottom third of the inside of the painted boxes to form the seat belts.
- Create a folded towel liner, and locate fabric scraps. For our double strollers, we used a 6.5" square of cotton, cut in half, to make two identical 3.25"x6.5" strips.
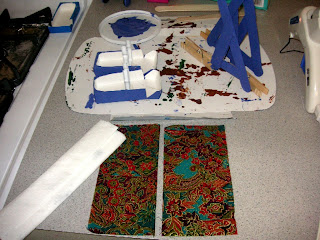
- Cut the folded towel to size and glue the fabric, (as described above in the single stroller instructions) to make a pair of matching upholstered stroller seat cushions.
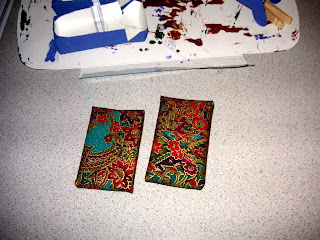
- Glue the completed cushions on top of the twist ties inside the seats.
- Glue the completed, cushioned seats, to either side of the dried, painted, middle piece.
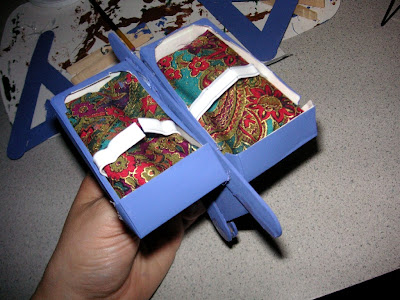
- Glue the two side pieces to the outer sides of the two seats. It is important to test this before gluing, to make sure it stands on its own, with all six "feet" touching the work
surface when the stroller stands alone. If it teeters a bit, it can be fixed by mounting the wheels a bit lower than the feet to adjust, but the toy will last longer and be more durable if this can be avoided.
- Cut another craft stick to the width of the back of the stroller, to add another truss. Glue it to the back of the double stroller and paint it.

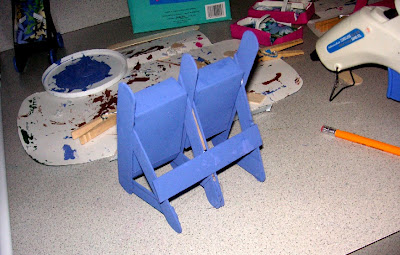
- When using metal washers as wheels, clothespins on both sides of each wheel make great clamps.

- Done!
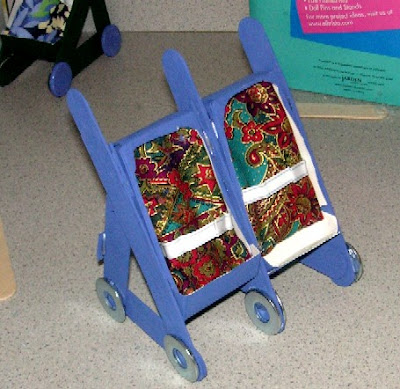
To make a double stroller (front-to-back style):
- Cut the faces from two matching painted boxes, and cut four identical diagonally cut craft sticks.
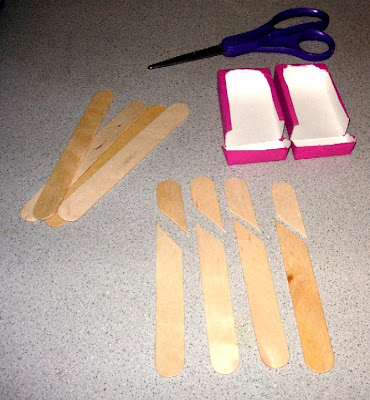
- Make two pair of mirror image upside-down-Y-shapes, and attach them at the tips, to result in two mirror-imaged but identically-angled and sized M shapes. I like to use the edge of the counter to help align them.

- Glue them into their M-shapes, one M-shape at a time, using the first as a template (flipped over) to get the angles to match as much as possible.
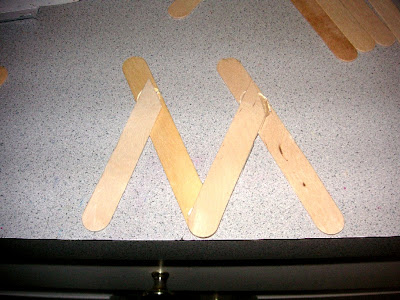
- Glue a whole craft stick along the bottom edge of each M-shape.
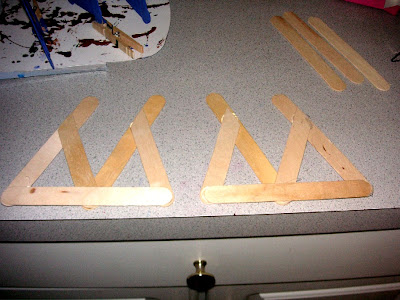
- Paint the shapes and allow them to dry.

- Glue twist-ties as seat belts to the inside of the two seats.
- Make upholstered seat cushions using paper towel and fabric scraps (as described above) and glue in place. Glue the two completed seats to one of the shapes.
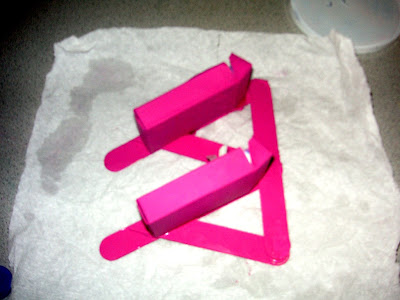
- Glue the other shape to the other side of the pair of seats.
- Glue on wheels, and you're good to go!
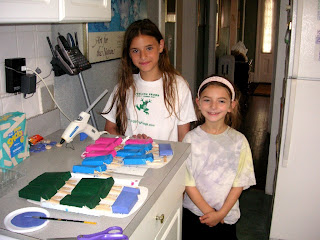
For making many strollers, it helps to do each step in assembly-line fashion, for mass production:
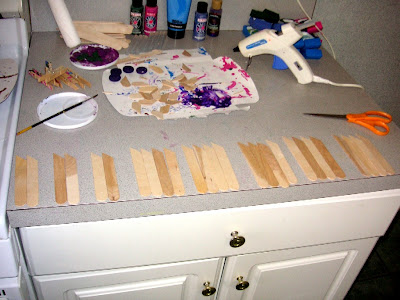
The hardest part for us, is making enough strollers in the right colors to satisfy the crowd.